You can use the HTML audio tag to easily include any audio content inside your web page. Any audio file formats, like WAV, MP3, OGG, and more, can be integrated on your webpage. This element also consists of attributes to control the playback of the audio tag, such as play, pause, or volume buttons.
Here, we will learn more about the HTML audio tag and how we can implement this tag in our HTML document.
What is the HTML audio Tag?
The HTML audio tag is an element in a web page that is used by developers to embed audio content in the webpage. With the integration of Javascript, audio elements can enable custom audio controls managing different aspects of audio playing i,e. Play, pause, audio volume, and more.

- The HTML audio tag can be implemented using the <audio> tag.
- This tag element starts with an opening tag i,e. <audio> and ends with </audio> tag. Everything inside it includes the attribute and source link for the audio tag.
- There are many attributes supported with the <audio> tag i,e. controls, autoplay, muted, src, loop, and more.
- A single HTML document might contain one or more audio sources.
- The controls attribute in the <audio> tag can be used to add audio controls like play, pause, and volume.
- The <source> attribute can be used to provide alternative audio to the browser, which it might choose when the first one fails to get recognized.
The Basic Syntax of the HTML audio Tag

You can include an audio file in a webpage using the <audio> tags in HTML that start with a <audio> tag and end with a closing </audio> tag.
| <audio controls>
<source src=”audio-file.mp3” type=”audio/mpeg”> <source src=”audio-file.ogg” type=”audio/ogg”> Your browser does not support the <audio> tag element. </audio> |
- The <controls> attribute in the <audio> tag is used to display the playback controls in audio.
- The <source> element here gives an alternative to the browser to choose the supporting format
- The text enclosed within the <audio> tag is used when the tag is not supported by a browser.
There are two formats of the audio tag being enclosed within the <audio> tag. If the web browser fails to interpret the first one in MP3 format, it will use the one in .ogg extension format.
The Attributes of the HTML <audio> Tag
Check some major attributes of the HTML audio tag used with the element.
| HTML Audio Attributes | Description |
| src | The src attribute shows the path i,e.url of the audio file to be played on the webpage. |
| controls | It displays the various audio controls available, like play, pause, and volume. |
| autoplay | The autoplay attribute begins playing the audio automatically whenever the page loads. |
| loop | The loop attribute is used to set the audio playback to repeat automatically after it ends. |
| muted | It mutes the audio by default whenever the page loads. |
| preload | It specifies how the audio file should be loaded when the page loads. It can have these three values:
|
| crossorigin | It handles the cross-origin requests for audio files. It can have the following values:
|
| type | The type attribute specifies the MIME type of the audio file commonly used inside <source> elements. |
| mediagroup | It groups multiple media elements, like audio or video, to synchronize playback. |
| controlslist | It allows developers to control which buttons appear in the controls bar |
| disableremoteplayback | It prevents the audio from being played on remote devices. |
Note: The attributes like “width or height” are not supported with the HTML <audio> tags. Hence, you cannot specify the shape and size using these attributes despite being present with the HTML <video> tag.
HTML <audio> Tag Events
There are some events that you will notice while using the <audio> tags in HTML. Make sure you are familiar with these events so that you can interpret them in the best ways possible and act accordingly. Check some of the tag events present in the audio tag used in HTML below.
| Event | Description |
| audioprocess (Deprecated) | This depicts that the input buffer of a ScriptProcessorNode is ready. |
| canplay | The browser can play media, but may need buffering later. |
| canplaythrough | The browser can play media to the end without buffering. |
| complete | It notifies that the OfflineAudioContext rendering has finished. |
| durationchange | This signifies that the media duration has been updated. |
| emptied | The media has become empty or reloaded. |
| ended | Playback ended as the media reached its end. |
| loadeddata | It says that the first frame of media has loaded. |
| loadedmetadata | The complete metadata has been loaded. For example, the audio duration |
| loadstart | The browser started loading the audio resource. |
| pause | It tells that the audio playback has been paused. |
| play | It tells that the audio playback has started. |
| playing | It tells that the audio is playing after being paused or buffered. |
| ratechange | It tells that the audio playback speed has changed. |
| seeked | It seeks the operation (jump to time) completed. |
| seeking | The seek operation has started. |
| stalled | The browser tried to fetch data, but none was received. |
| suspend | The media data loading has been suspended. |
| timeupdate | The current playback time has been updated. |
| volumechange | The audio volume level has changed. |
| waiting | The playback stopped temporarily due to buffering. |
When to Use the HTML Audio Tag?
The <audio> tag works when we have to add sound recordings or playbacks to our webpage.
1. Sound Effects or Background Themed Music
An HTML audio tag can be used with the autoplay feature to play background-themed music or sound effects for a particular section automatically when the page opens. You can implement the autoplay with the simple “autoplay” attribute along with “loop”.
| <audio autoplay loop>
<source src=”audio-music-theme.mp3″ type=”audio/mpeg”> </audio> |
The autoplay attribute starts the playback of the audio element whenever the page loads.
The loop attribute is used to ensure the audio element continuously plays or resumes playing.
2. Language Learning Applications
The <audio> element can be used as a reference by the learning applications, where they guide their learners using the audio attachments on their webpage.
| <audio controls>
<source src=”pronunciation-lession-1.mp3″ type=”audio/mpeg”> </audio> |
3. Podcasts or Interview
Any podcast sessions or interviews can be embedded on a webpage using the HTML audio tag. All you need is the “podcast-audio.mp3” with you.
| <audio controls>
<source src=”podcast-audio.mp3″ type=”audio/mpeg”> <source src=”podcast-audio.ogg” type=”audio/ogg”> </audio> |
How to use the HTML <audio> Tag?
You have to use the <audio> element to include the audio tag along with certain other attributes.
- You will need to start the HTML audio tag with the opening <audio> tag and closing </audio> tag.
- No texts are enclosed to be displayed as an anchor on screen; rather, text enclosed within these tags is displayed when the browser does not support the <audio> tag. Also known as the fallback text.
- You can add attributes to control playback of your audio elements using the “control” attribute.
- You can use the <source> element to let the browser choose the best format supported.
Let us compile all these things to embed a simple <audio> element in the HTML document.
| <audio controls>
<source src=”audio-file.mp3” type=”audio/mpeg”> <source src=”audio-file.ogg” type=”audio/ogg”> Your browser does not support the <audio> tag element. </audio> |
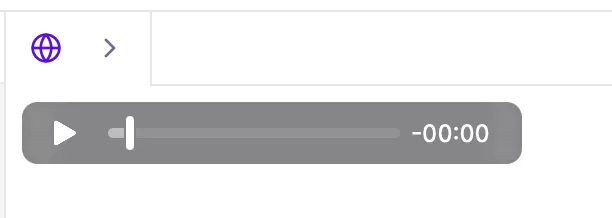
Here, you can easily notice all the elements present, which will be displayed on the webpage, along with controls and alternatives in case of failure.
 |
Examples of the HTML audio Tag
Let us check a simple representation of the <audio> tag in the HTML document.
| <!DOCTYPE html>
<html lang=”en”> <head> <meta charset=”UTF-8″> <meta name=”viewport” content=”width=device-width, initial-scale=1.0″> <title>HTML Audio Tag Example</title> </head> <body> <h2>Example of HTML Audio Tag</h2> <!– Audio Player Example –> <audio id=”myAudio” src=”sample-audio.mp3″ controls autoplay loop muted preload=”auto” onplay=”alert(‘Audio has started playing!’)” onpause=”alert(‘Audio has been paused!’)” onended=”alert(‘Audio playback ended!’)”> Your browser does not support the audio element. </audio> <p><b>Description:</b> This example shows an audio file that starts automatically, loops continuously, and includes basic playback controls.</p> </body> </html> |
Note: This example does not contain the “audio file”, and hence, when you embed the actual audio file, you will get the audio playback with all the features and controls of attributes.
 |
The “Error” tag here is due to the non-availability of the actual audio element in the code. You can copy the code and embed the actual audio from your device, and implement it on your webpage.
HTML Audio Tag FAQs
Q1. What is the HTML audio tag?
Ans: The HTML audio tag is an HTML element used to embed audio elements inside the webpage for displaying theme songs, podcasts, interview clips, guides, and more in audio format.
Q2. How to implement audio in web dev projects?
Ans: You can implement the audio tag in your project using the simple audio> tags.
Q3. How to create an audio tag in HTML?
Ans: You can implement the audio tag using the audio> tag along with the audio file path using the src attribute, controls, and other attributes.
Q4. Is the HTML audio tag a self-closing tag?
Ans: The HTML audio tag is not a self-closing tag; it starts with the opening audio> tag and ends with a closing audio> tag. It contains attributes inside.
Q5. Can I play or pause audios using the HTML audio tag?
Ans: You can use the control attribute in the audio tag to control activities like pause, play, and more.
Q6. What is autoplay in tags?
Ans: The autoplay attribute in the HTML audio tag makes the audio element start playing every time the webpage loads.

