Prototyping is important for plenty of reasons. It helps you to see how new user flows will work. You can also share these user flow design patterns with your team, test them with users, and get valuable feedback based on your design. Plus, it’s a great way to show your designs to stakeholders and get their approval. But the common question is “How to create these prototypes” This is where the Figma prototype comes in!
Figma prototype is a great tool, used for creating UX/UI design. It helps you to add multiple interactive elements to your designs by making them more realistic. In just a few minutes, you can turn your static designs into something that feels like a real website or product.
Figma Prototype – Key Takeaways
- Understanding the Concept of Prototyping
- How to add prototype flows
- How to add interactions.
- How to create a fixed position
- How to create interactive components
- How to present and share your prototype
Prototyping
Before moving on to the more advanced topics, let’s start this guide with the basics of prototyping. Organizing your designs and getting to know the key features of prototyping will help you to keep your work safe and make your process faster.
When you begin prototyping, make a copy of every screen and component you’ll add in a new page. Arrange these copies in a clear and logical order, giving each one an easy-to-understand name. By using copies, you can work on multiple prototypes without affecting your original designs. This way, your original work stays safe and well-organized.
Where To Access Key Features
You can find commonly used prototype features in the right-hand panel under the “Prototype” tab. Here’s a breakdown of all the features that you will find under this tab:
- Prototype Panel: This is where you’ll find all the tools you need for prototyping.
- Add a New Prototype Flow: Start a new flow for your prototype here.
- Add and Configure Interactions: This is used for setting up how users will interact with your design.
- Add and Configure Overflow Scrolling: Here, you can control scrolling for lengthy content that goes beyond the screen.
- Configure Prototype Settings: Adjust settings like device type and starting point for your prototype.
- Present Prototype: Use this option to view and share your prototype.
Add Prototype Flows
A prototype flow is a sequence of steps that shows how a user will navigate through your design. In Figma Prototype, you can have multiple prototype flows in a single file, each with its own starting point and name.
To create a flow, you need to set a starting point and give it a unique name. First, select the frame you want to use in your flow. Then, click the “Add” icon next to “Flow Starting Point.” After adding the starting point, you can rename the flow by clicking on the name field. You can also add a description by clicking the “Edit” icon next to the flow name. If you need to remove the starting point, simply click the “Delete” icon next to it.
Add Interactions
Interactions are the key elements used in the building of a prototype. They show how different parts of the design behave, react, and connect with each other. Interactions can be simple, like a quick animation, or more complex, involving moving elements or changing properties. Interactions are created by linking two layers and setting how they work together using triggers, actions, and animations. Let us understand what these triggers, actions and animations means
- Trigger: This is what starts the interaction, like tapping, clicking, dragging, or hovering over an element.
- Action: This is what happens when the trigger is activated, such as navigating to a new page, opening or closing an overlay, or scrolling to a section.
- Animation: This defines how the action behaves. It could be an instant change, a smooth dissolve, a sliding motion, or an element moving in or out.
Instant Interactions
Use “instant” animations when you want an action to happen immediately, without any movement or visual effects. This is perfect for things like switching between pages or showing a pop-up message.
Figma Prototype Examples Of Instant Interaction:
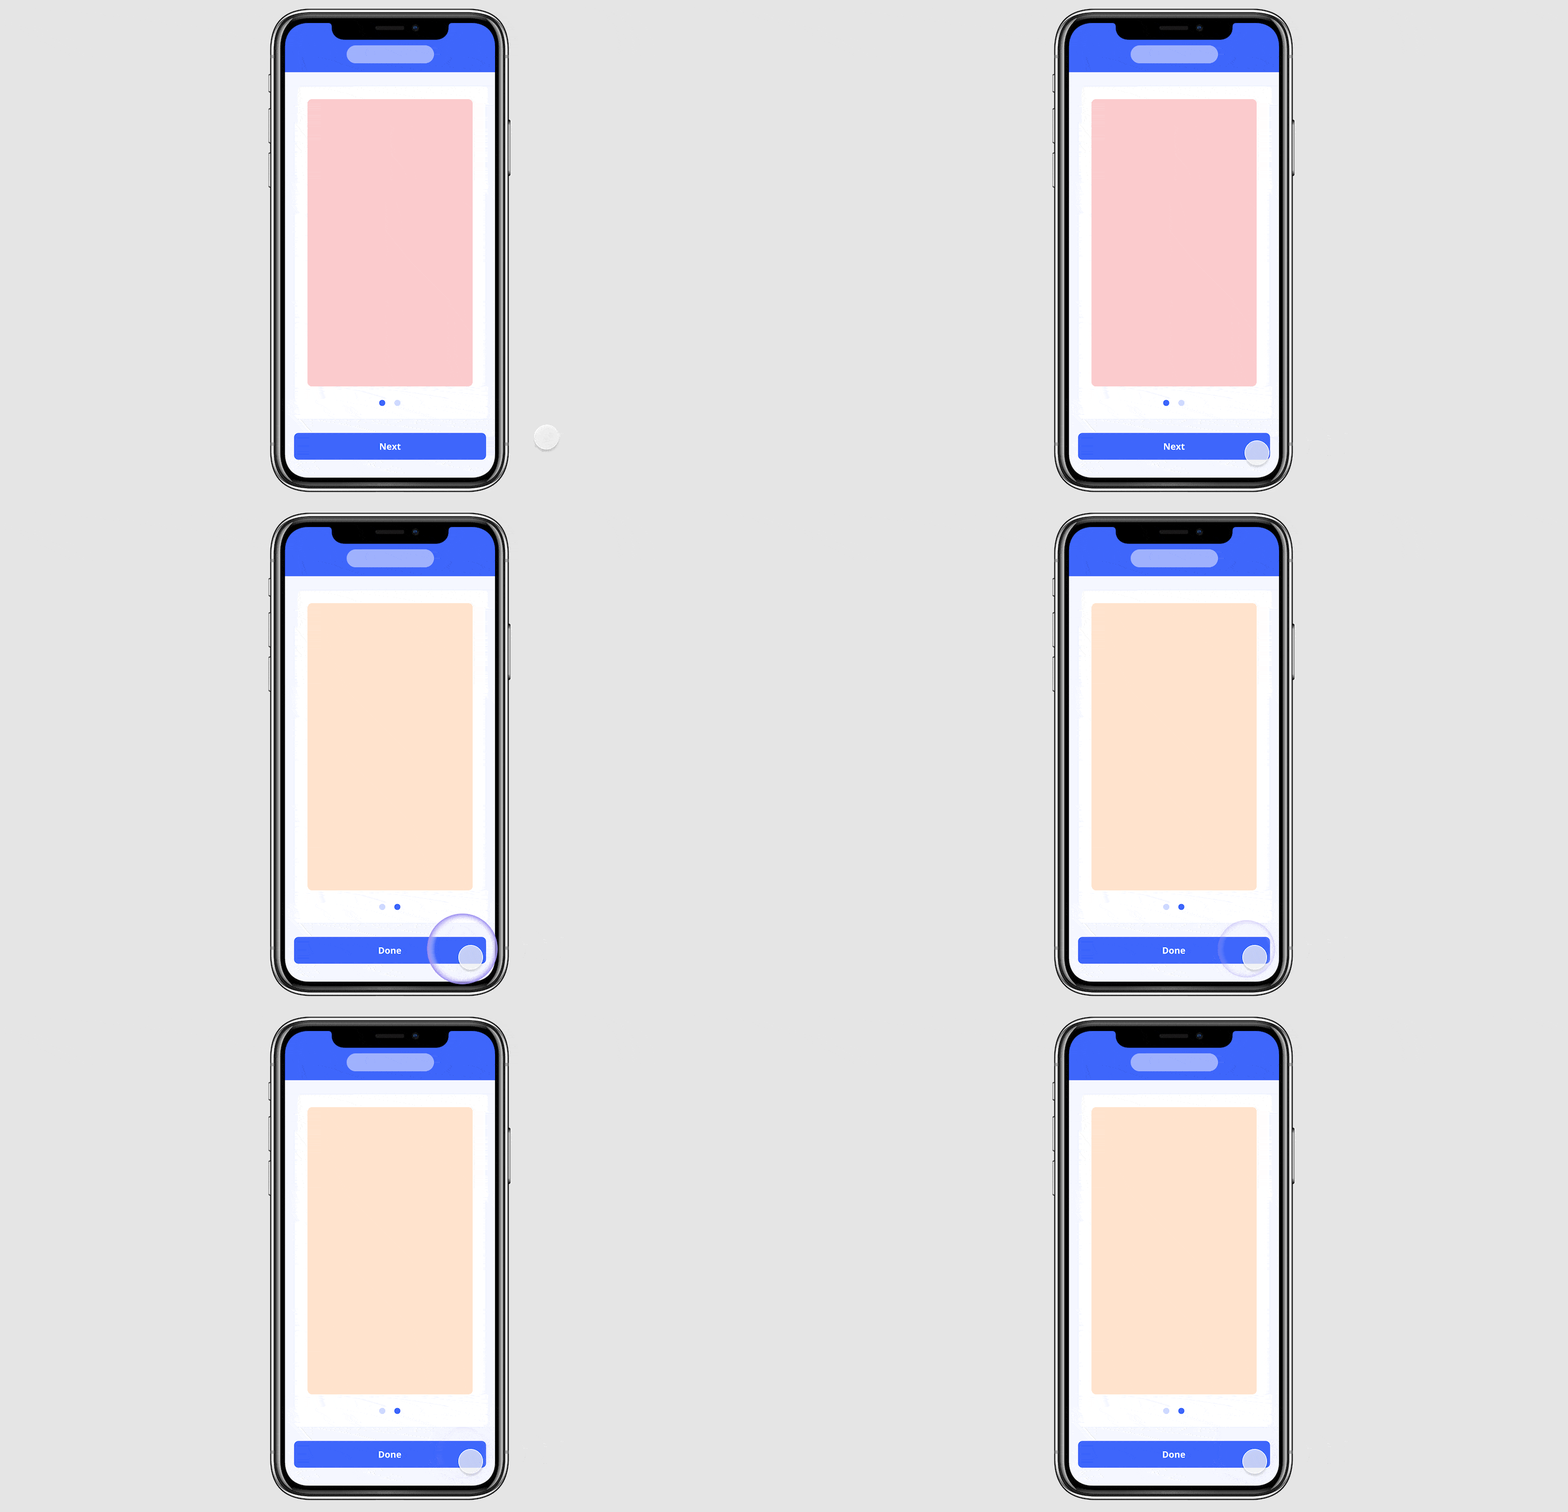
When you tap a button to go to a new page, the page will appear instantly without any delay or animation. Let us understand it better with the diagram given below-

Using Animated Interactions
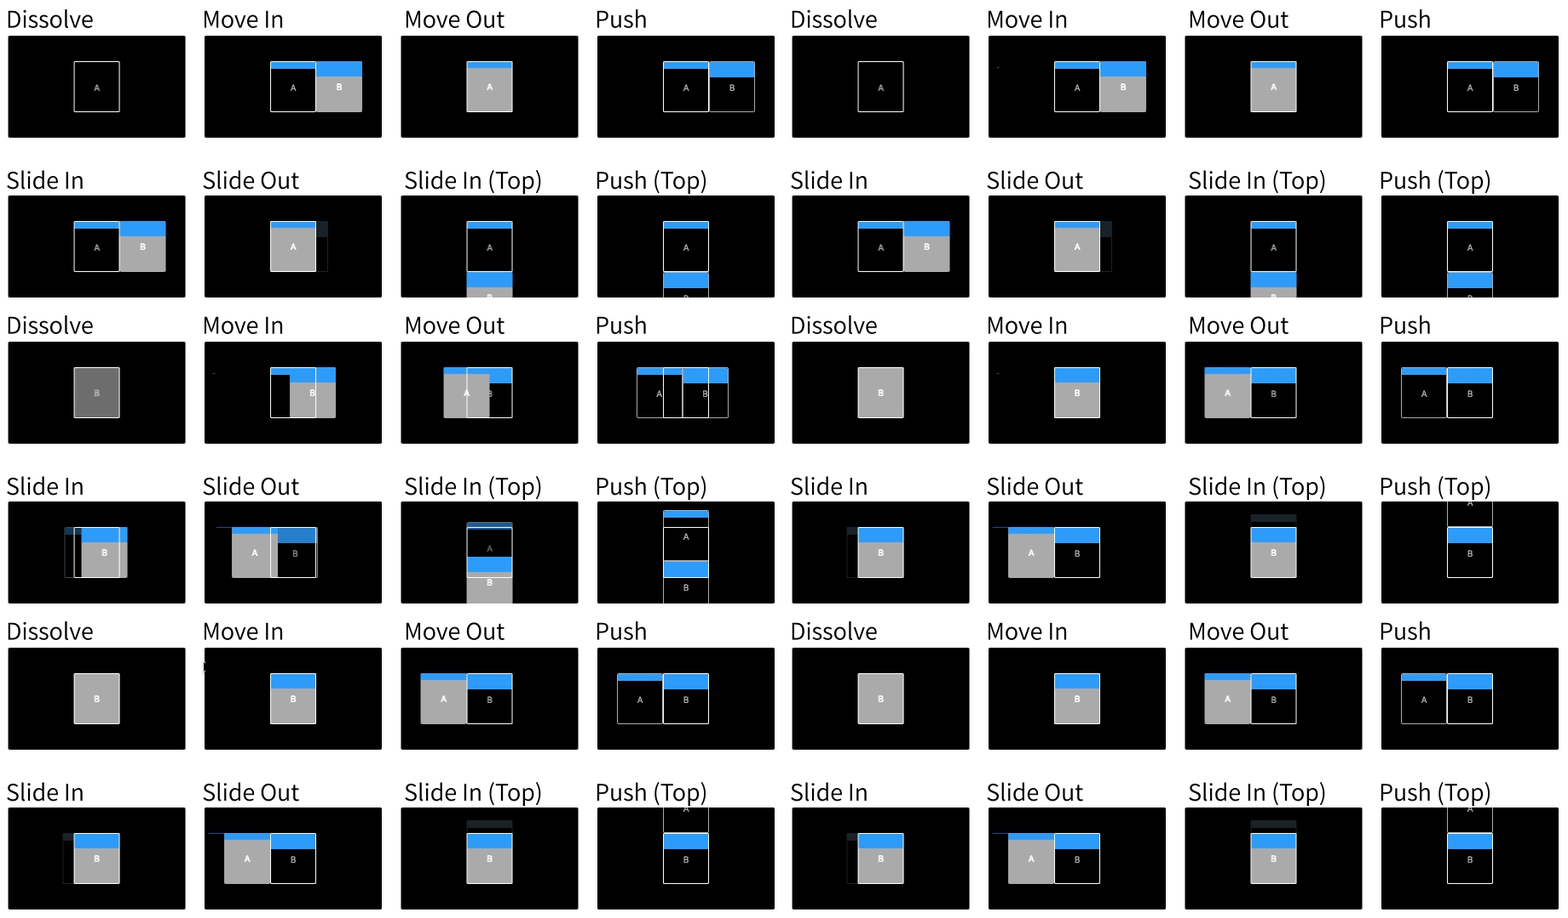
You can use animations to make interactions more dynamic by adding movement, such as sliding in or out, pushing content around, and much more. These animations can make your design feel more alive and engaging. You can also customize how the animation looks by selecting different easing curves, which control the speed and flow of the animation, and by adjusting the timing to make it faster or slower. This helps you to create a smooth and visually appealing user experience throughout your application.
Some of the commonly used animation designs in Figma are mentioned below in the diagram for your better understanding of the concept.

What Are Easing Curves?
Easing curves control how the speed of an animation changes at different stages. In a linear animation, the speed stays the same from start to finish. However, with “easing curves” the animation starts slowly and then speeds up in the middle stage. Using easing curves makes animations feel smoother and more natural.
Installing Fixed Element In Prototype
Fixing an element’s position means it will stay in the same spot on the screen even when you scroll up or down. This is useful for things like navigation bars or buttons that you want to make visible always.
To activate this feature, go to the Design Panel and look for the “Constraints” option. Here, you can set the element to stay fixed in one place, making sure it remains in view no matter how much you scroll.
Add Overflow Scrolling
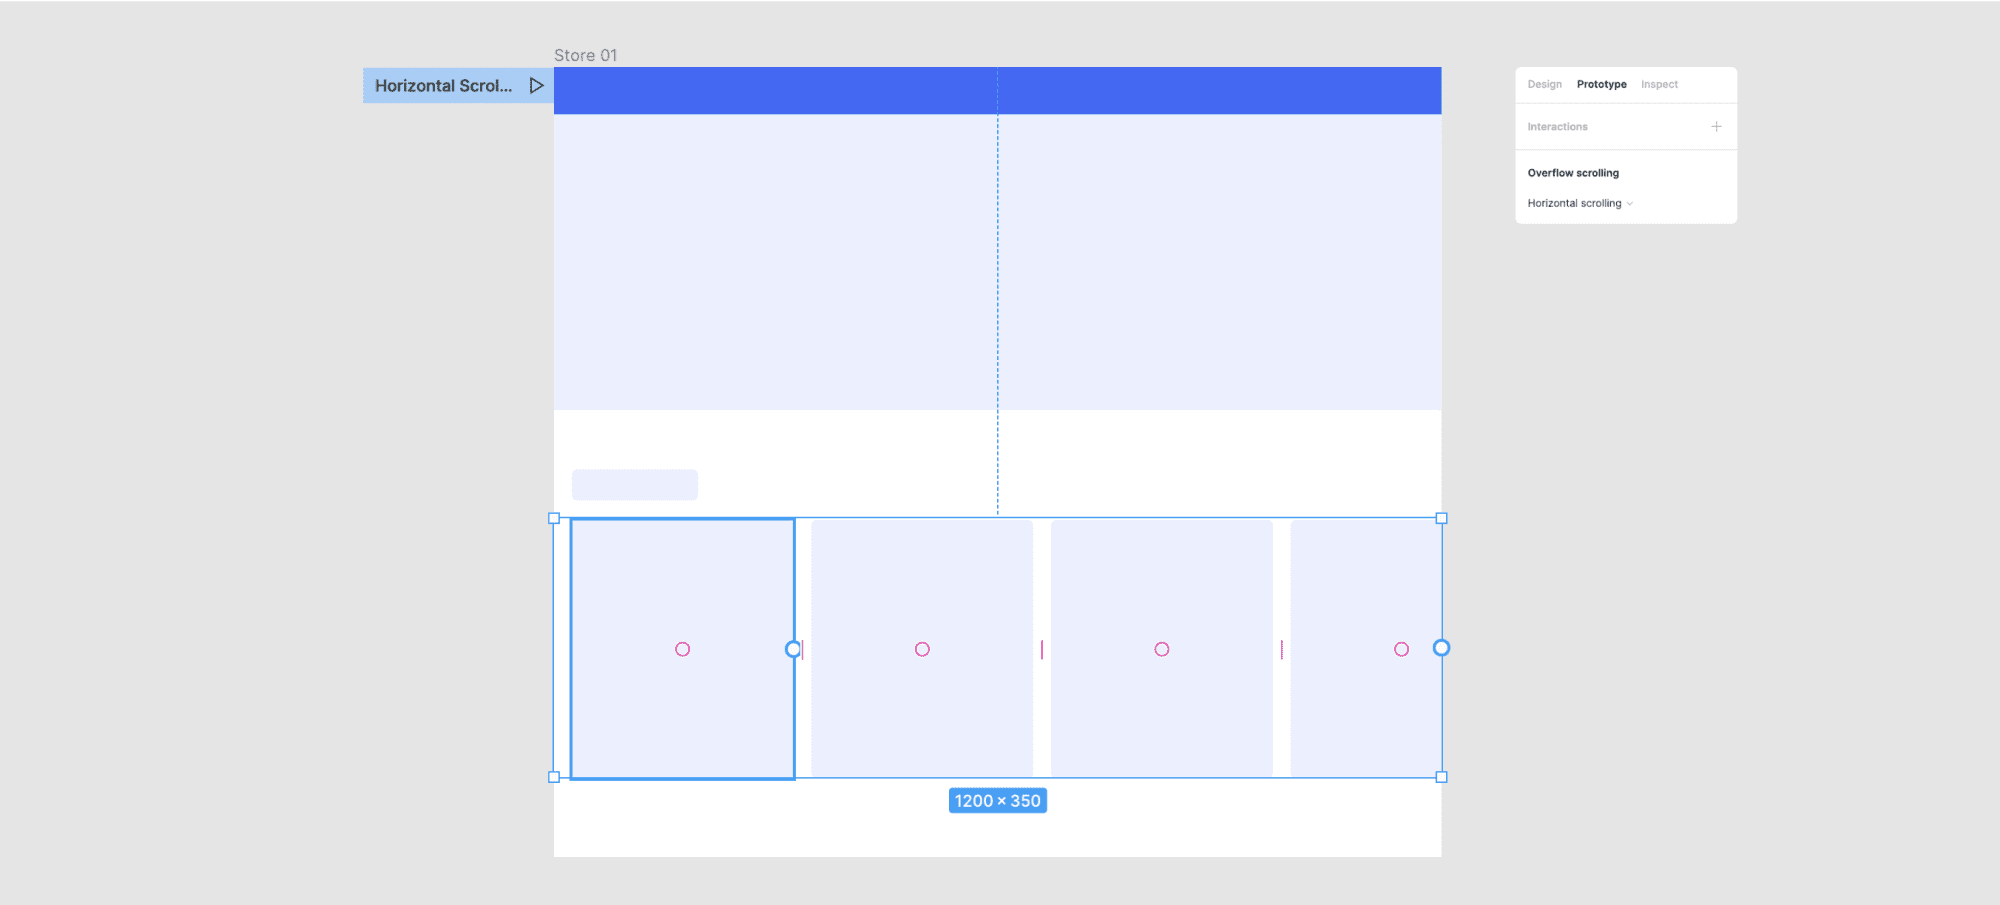
Overflow scrolling allows you to scroll through parts of your prototype that extend beyond the visible area. This is useful for sections like lists, carousels, or menus that need their own scrolling. To use this feature, you need to set up a frame with content that goes beyond its edges. This extra content will be hidden by default, and you can scroll to see it. The diagram below from UI Prep will help you to understand this concept with more clarity.

View Your Prototype
To view and interact with your prototype you need to open the presentation tab. You can select different device mockups to see how your prototype looks on various devices. Anyone who can access the prototype can explore it and leave comments for the team.
Adjust Prototype Settings
To change how your prototype appears, go to “Prototype settings” and choose the device you want to display it on (like a google Pixel 2, iPad, iPhone 15, or a custom size). The setting you will choose will apply to every prototype flow on your page and you will be able to see how your prototype model will look on the particular device.
Presenting Your Prototype
Now the main step after testing and viewing your prototype is to present your figma prototype. For presenting it, click on the “Present” icon near the starting point of your flow or in the top toolbar. If you have more than one flow on the same page, you can switch between them using the sidebar. You can also add comments, mention team members, ask questions, or give feedback by using the sidebar.
Sharing Your Prototype
Once the figma prototype is presented successfully, its time to share your prototype with clients, stakeholders, or someone else. To share it, click on “Share Prototype” in the presentation toolbar. If you want to share just the prototype and not the entire design file, choose “can view prototypes only” in the sharing options.
Learn Figma With PW Skills
PW Skills is offering a free Figma design course that will help you to learn each and every concept of the Figma design tool in a beginner-friendly manner. You will also create various prototypes and models here which will help you to apply your learning in practical scenarios.
Apart from this, we are also offering a comprehensive 6-month long job assistance program in Design UI UX Course, if you are looking to start your career in the field of UI/UX design that too with 100% job assistance guarantee and live-interactive classes, then this course is for you!
Visit PWSkills.com to explore course features and start your journey today with us.
Figma Prototype FAQs
How do I create a prototype in Figma?
To create a prototype in Figma, switch to the "Prototype" tab, then connect frames by dragging the blue arrow from one frame to another. You can define interactions like "on click" and set animations or transitions between screens.
Can I share my Figma prototype with others?
Yes, you can share your Figma prototype by selecting the "Share Prototype" option. You can choose to share just the prototype or the entire design file.
How do I test my Figma prototype?
To test your Figma prototype, click on the "Present" button in the top toolbar. This will open a new window where you can interact with your prototype as if it were a real app or website.

